After some discussion about the valve heater wiring connectors, me and Vin* (the guy who designed the kit) agree that this is the correct wiring for the power transformer. If you disagree, please leave a comment before I get round to plugging it in!
Left, top to bottom:
red - HV secondary TO V6 PIN1
red - HV secondary TO V6 PIN7
grey - HV primary TO MAINS (NEUTRAL)
yellow - 6.3V rectifier filament secondary TO V6 PIN4
green - 6.3V filament secondary TO MAIN VALVE HEATER WIRING
Right, top to bottom:
red/yellow - HV center tap TO GROUND
black - HV primary TO POWER SWITCH MAINS (LIVE)
yellow - 6.3V rectifier filament secondary TO V6 PIN5
green/yellow - 6.3V filament center tap TO GROUND
green - 6.3V filament secondary TO MAIN VALVE HEATER WIRING
*Don't worry Vin, I won't hold you responsible
Wednesday, 8 May 2013

That shrinking feeling
My trusty Iroda soldering iron / heat gun. (I might do a post on tools at some point.)

A couple of bits of heat shrink on the legs:

And in situ, ready for soldering.

Looks quite neat. And prevents anything shorting on it. The excellent Doctor Tweak sells a variety of colours in a handy bundle

Monday, 6 May 2013
Big Iron (Part III)
OK, I'm having a slow day.
How do the connections on the diagram (left) match up with the PT instructions (right)?

How do the connections on the diagram (left) match up with the PT instructions (right)?
Input jacks
Input jacks with the 1M resistors.
The trick is to solder the 1M resistor in place at the bend, return to the chassis and solder in the connecting bus wire, leaving the tags that are going to have signal or ground wire attached unsoldered until later.
That was the approximate plan, anyway.


The trick is to solder the 1M resistor in place at the bend, return to the chassis and solder in the connecting bus wire, leaving the tags that are going to have signal or ground wire attached unsoldered until later.
That was the approximate plan, anyway.


Turret board with some wiring
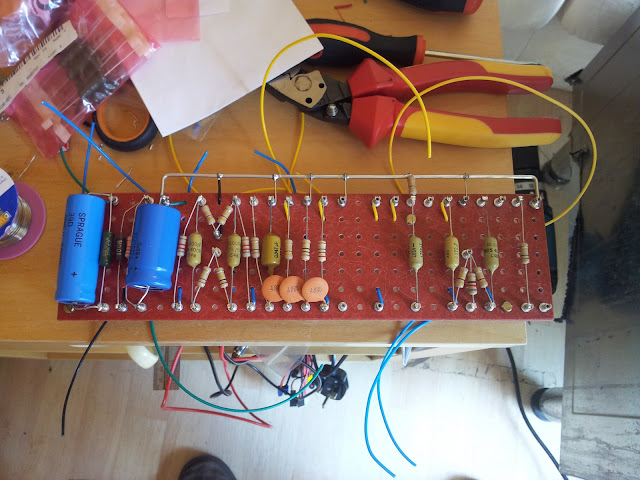
Almost completed turret board and wires. Just missing a couple of resistors and caps now, and a couple of wires. Looks quite neat!


Subscribe to:
Posts (Atom)